Creating a Classic Fantasy Base
- creating an old school fantasy base with lots of growth, moss, flowers, and roots.
The inspiration for the base work on the Empire Wizard pictured above came a classic artwork by John Blanche - his îKnight Pantherî. In this tutorial I am having a second go at this type of base creating a suitably setting for a Mordheim Freelance Knight which I painted a few years ago.
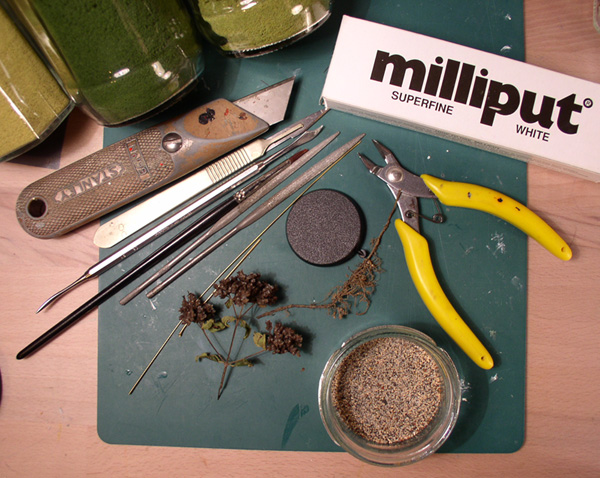
Materials/tools: 40 mm round base, plastic card, 1mm wire, Milliput, fine sand, 3 kinds of fine turf flock (mid green, light green, yellow green), tiny roots and very small dried flowers from the garden + paints, brushes, sculpting tool, craft knife, hobby file, super glue, and pva glue.
The base step-by-step
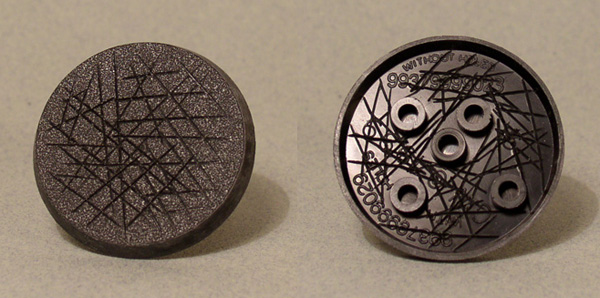
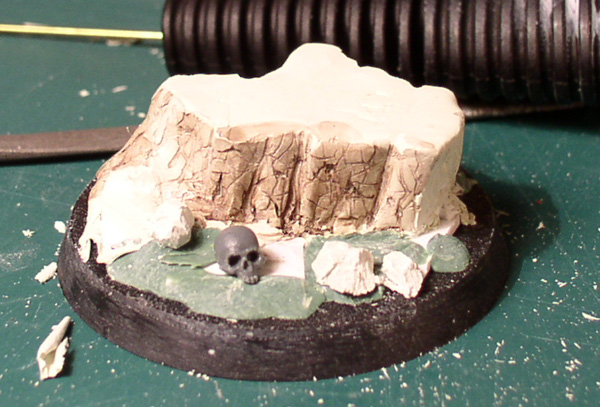
1. First I clean up the 40 mm base. I also score the top surface of the base and underneath with a craft knife. This is done to give the putty some cracks to adhere to when building the base. Scoring the base underneath helps if you decide to add a display base later on:
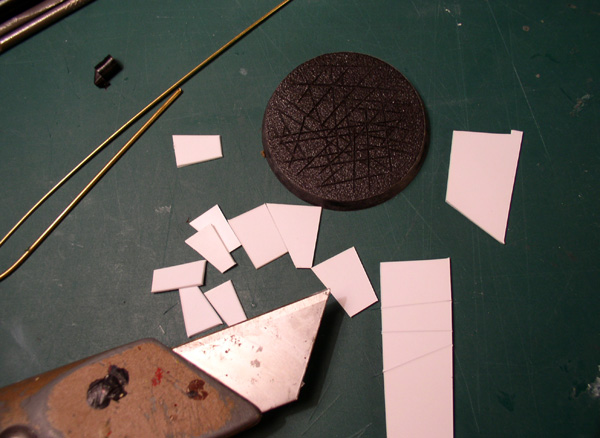
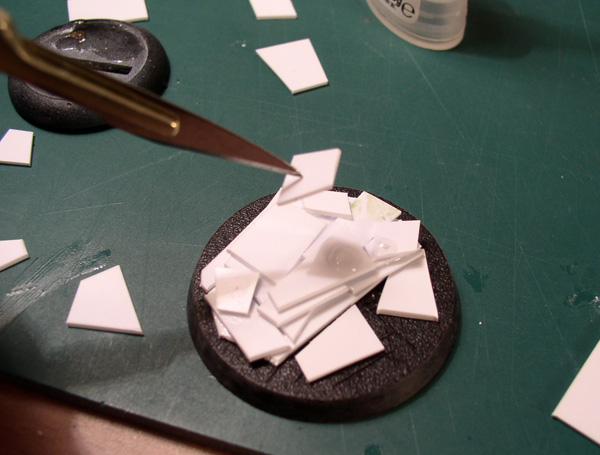
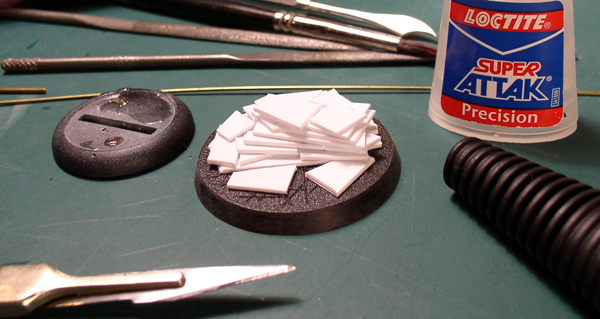
2. Then start working on getting the basic ground formations in place. For a start I use brass wire and plastic card. Some people might was to ditch the plastic card step, but I find plastic card ideal for the inner construction since you can get the rough shape in place really quickly. And having a good base for the following layer of miliput is ideal and helps to get the shape right. A few holes are drilled into the plastic card and through the base. Into these holes I insert some brass wire and glue the wire in place. This secures the base decoration in the same as pinning multi-part miniatures:
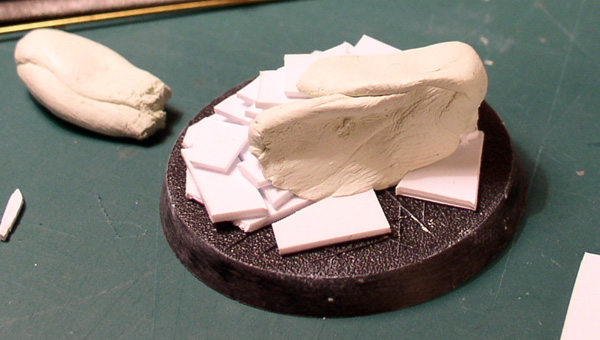
3. Now the ground formation is built using Milliput (I have added about º greenstuff to the Milliput which makes it easier to work with and a little less hard when dry). I add a good layer of putty the basic formation built in plastic card. When the putty has dried an hour or so I sculpt small crevasses trying to get a natural looking form - the picture is out of focus, but I am sure you get the general idea. Excess Milliput is formed to tiny rocks to use later:
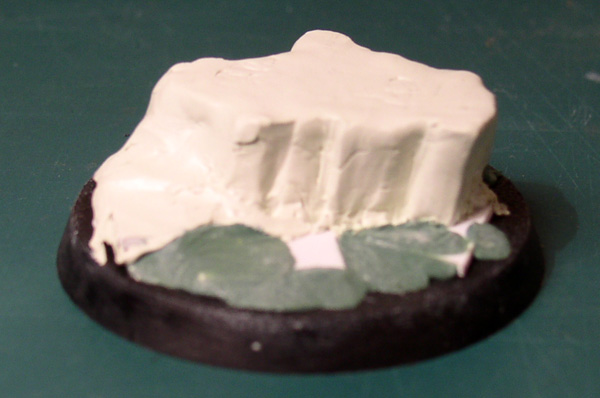
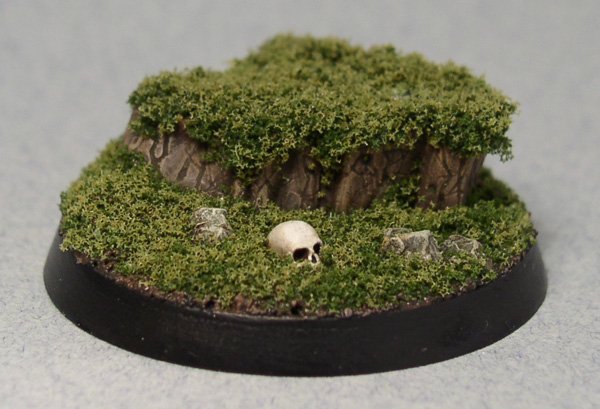
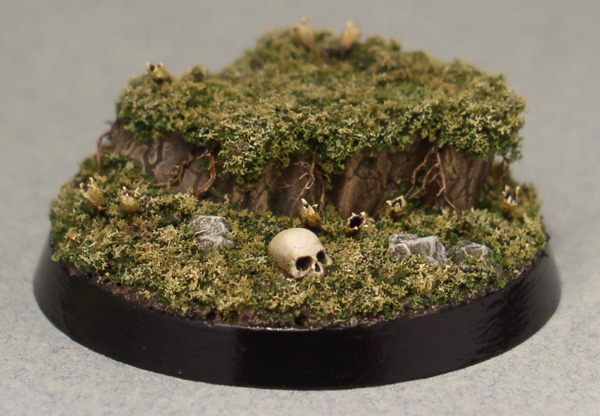
4. Now the putty is completely dry having dried over night and I start to file, cut, and scrape the surface to get a nice structure that will look like earth when painted up (- I washed an area with Devlan Mud to show the structure). Most of the structure is made by simply scoring the area from different angles with the tip of a craft knife. The tiny Milliput rocks are also filed and cut a little and then glued onto the base along with a single plastic skull. Both rocks and the skull were cut down to meet the base:
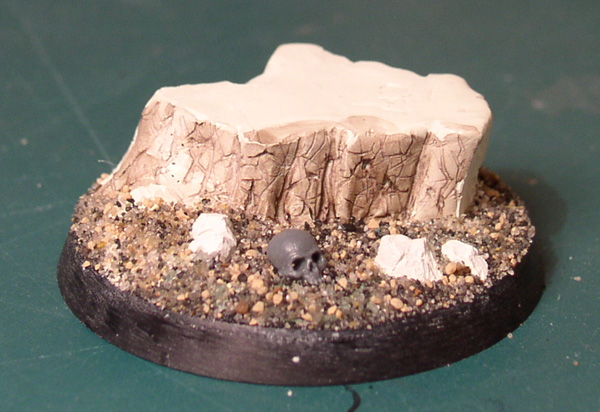
5. Adding sand to built op the ground level. This area wil be close to completely covered in fine flock so I somehow this is close to being a waste of time. However, I like using the sand to built up the level ground area. :-) I always add a second coat of thinned glue to secure the sand properly. For this I mix water, pva glue, and a drop of dish wash - the last ingridiens makes the mix flexible in such way that it almost works itself into the sand:
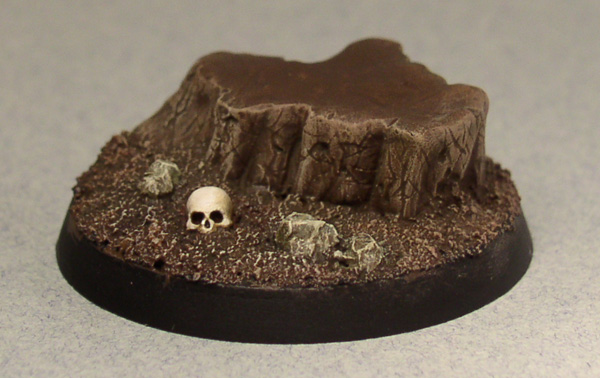
6. Painting the ground. The base is sprayed with Citadel Chaos Black Undercoat. Basecoat of P3 Battlefield Brown, drybrush with Battlefield Brown and P3 Khador Red Highlight, another drybrush of Battlefield Brown and Dwarf Flesh. Wash of Devland Mud mixed with a brushtip of VMC Reflective Green plus water. Finally, I gave the ground two careful drybrushes. First Khemri Brown, then Khemri Brown plus bleached Bone. The few rocks were painted using a mix of P3 Greatcoat Grey and Bronzed Flesh. Shaded using Devlan Mud and highlighted adding white to the basecolour. The skull was painted with a mix of Snakebite Leather and VMC Pale Grey and highlighted adding white:
7. Now the first layer of fine turf flock (a mid-green) is added. Paint a layer of slightly thinned pva-glue onto the area where the flock is to go and then sprinkle the flock over the base. Shake the excess flock off onto a piece of paper and leave the glue to dry:
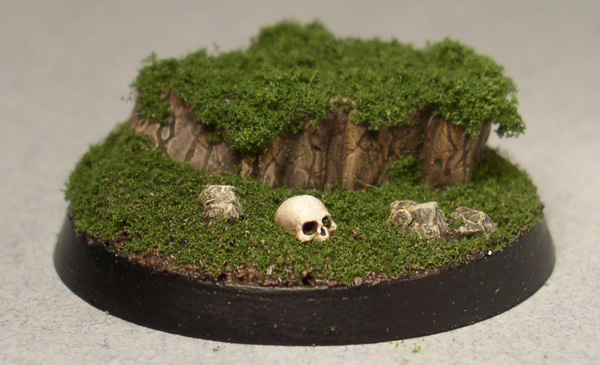
8. When the first layer of flock is dry I create a mix of water, pva glue, a fine brush tip of brown paint as well as a brush tip of dish washing liquid. This mix is painted all over the flock to make the flock more solid and sturdy and at the same time I have the glue in place for another, now lighter, layer of flock. So the flock is sprinkled over the area and the excess shaken off. This one called îFine turf Burned Grassî from Woodland Scenics.
9. Now I repeat the process using the glue/water mix described above to bind the second layer of flock and to glue on the third and final layer of flock. For this I use Woodland Scenics îYellow Grassî.:
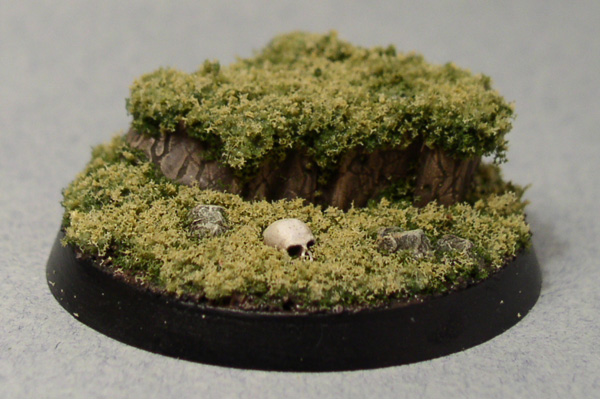
10. Excess flock is shaken and brushes off. A final wash of pva glue/water/disc wash/and brown paint is applied to tie the three different coloured flock together. Very much like a glaze really. This is followed by a careful drybrush of VMC Yellow green mixed with Bronzed flesh and White. Now the flock is done:
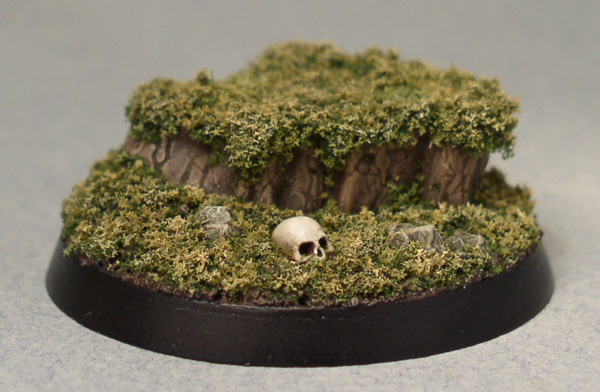
11. Then the additional details are added. Roots and tiny flowers. The roots are real, but very small roots that I have found in the garden. The flowers are dried parts of real flowers. I found some stuff in the garden and thought the shape would be useful... and it was. :-)
Roots and flowers are attached using superglue and a pair of tweezers:
12. The roots are highlighted using VMC Flat Earth mixed with a little Beached Bone. The flowers are given a basecolour of Bubonic Brown with a little purple ink added. Then I highlighted them using first Bubonic Brown plus white, and finally almost pure white on the very tips of each flower. At this stage I also gave the rocks an extra highlight of pure white on the very edges, and repainted the black edges with a gloss black :
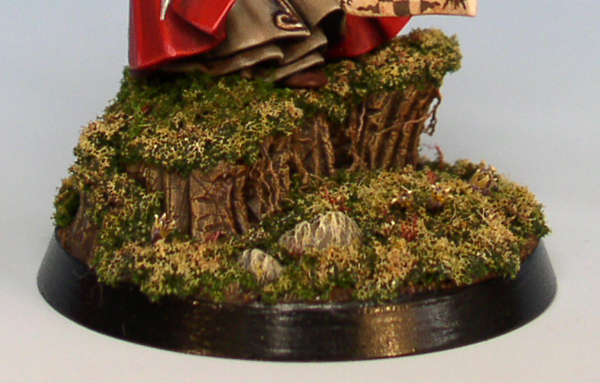
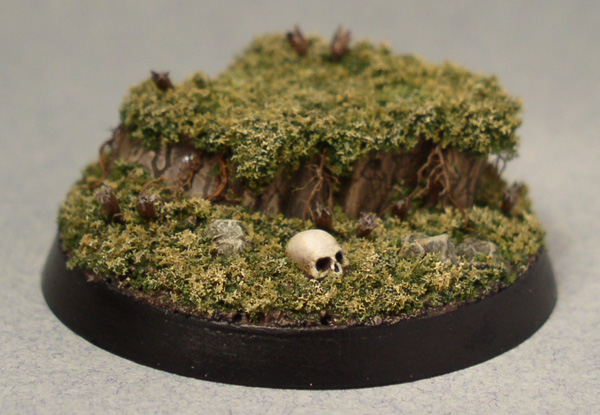
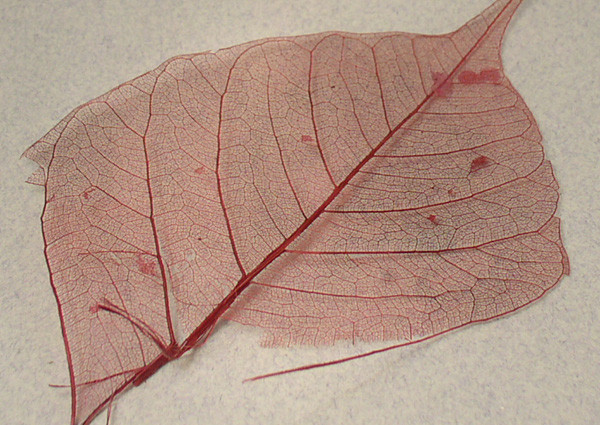
13. Finally I pinned and glued on the model, but... although I planned the base to be finished at this step, I felt that it could need a little extra. Some contrast. To add contrast to the grass I first added a little more of the darkest flock. Then I washed the grass at random, that is not all the grass but a few random areas, with a very thin redish brown glaze. I finally added a few red growth things (picture below) - this final addition is really leave-structures which has been dyed dark red and are normally used for X-mas decorations, wedding cards, and such stuff. I saved some of these after X-mas a few years ago thinking that they might find some use in the hobby at some point... I gave the red decoration things a subtle highlight here and there, but otherwise left them to work on their own...
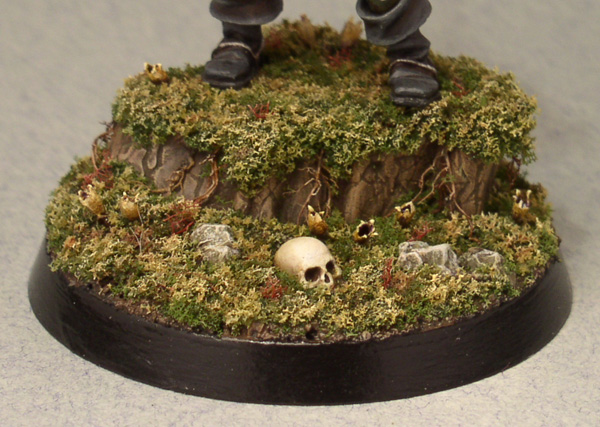
...finally finished and happy about the look. The last stage show my approach to mini-painting quite well: I have a plan. The plan is carried out, but not without constant attention to the way the elements in the plan work together. In this example I modified my plan by adding some extra stuff to properly finish the model. Thats it. Check out the finished model: Freelance Knight.